
Wedding Timelines Made Easy: Tips from an Ohio-Based Traveling Wedding Photographer

Let’s be honest…wedding day timelines can be pretty intimidating. I get it, but just know you’re not alone!
I’ve made wedding day timelines and timeline templates more times than you can imagine & I’m here to help you break it down!
A lot of couples Google their ceremony start time and try to build a timeline around it. I highly suggest ditching that method! Here’s what to do instead: First, consider the events you want to include in your wedding day. Then, discuss with your partner the order you want those events to take place. Next, you’ll need to consult with your vendors about the amount of time needed for each of them. Then, and only then, should you tackle your timeline!
Let me break it down for you.
1. Considering Events

Make a list of all of your must haves. Then, add all additional elements to this list including getting ready, family photos, ceremony, reception, etc.
Start by talking with your partner about what you do and don’t want to include in your big day. For example, many couples love to do a “first look.” Some couples set aside time for sunset photos, and others want to ditch things like a garter and bouquet toss, or even getting ready moments.
2. Order of Events

Take your list of events, and put them in the order you want them to occur.
Next, you’ll want to decide the order you want these events to take place. This is where your day gets pretty customizable! I want to encourage you to do what feels right to YOU!
For example, some of my couples like to do their first dance upon entering their reception hall, while others prefer dinner to be served right away. Some couples like to get all family photos out of the way before the ceremony so they can take a party bus out during cocktail hour, while others like to take family photos after the ceremony.
3. The Amount of Time for Each Event

Next to your order of events, write out approximately how long they will take
This is where I suggest talking with your wedding planner, or in many cases, your photographer. It’s also important to consult your hair and makeup artist, and to consider things like traveling from one venue to another. You need to have a good understanding of how long your hair and makeup will take, the amount of time your photographer will need for family photos, bridal party photos, etc., and how long your ceremony will last. Set aside increments of time for each of these events.
Creating your Timeline
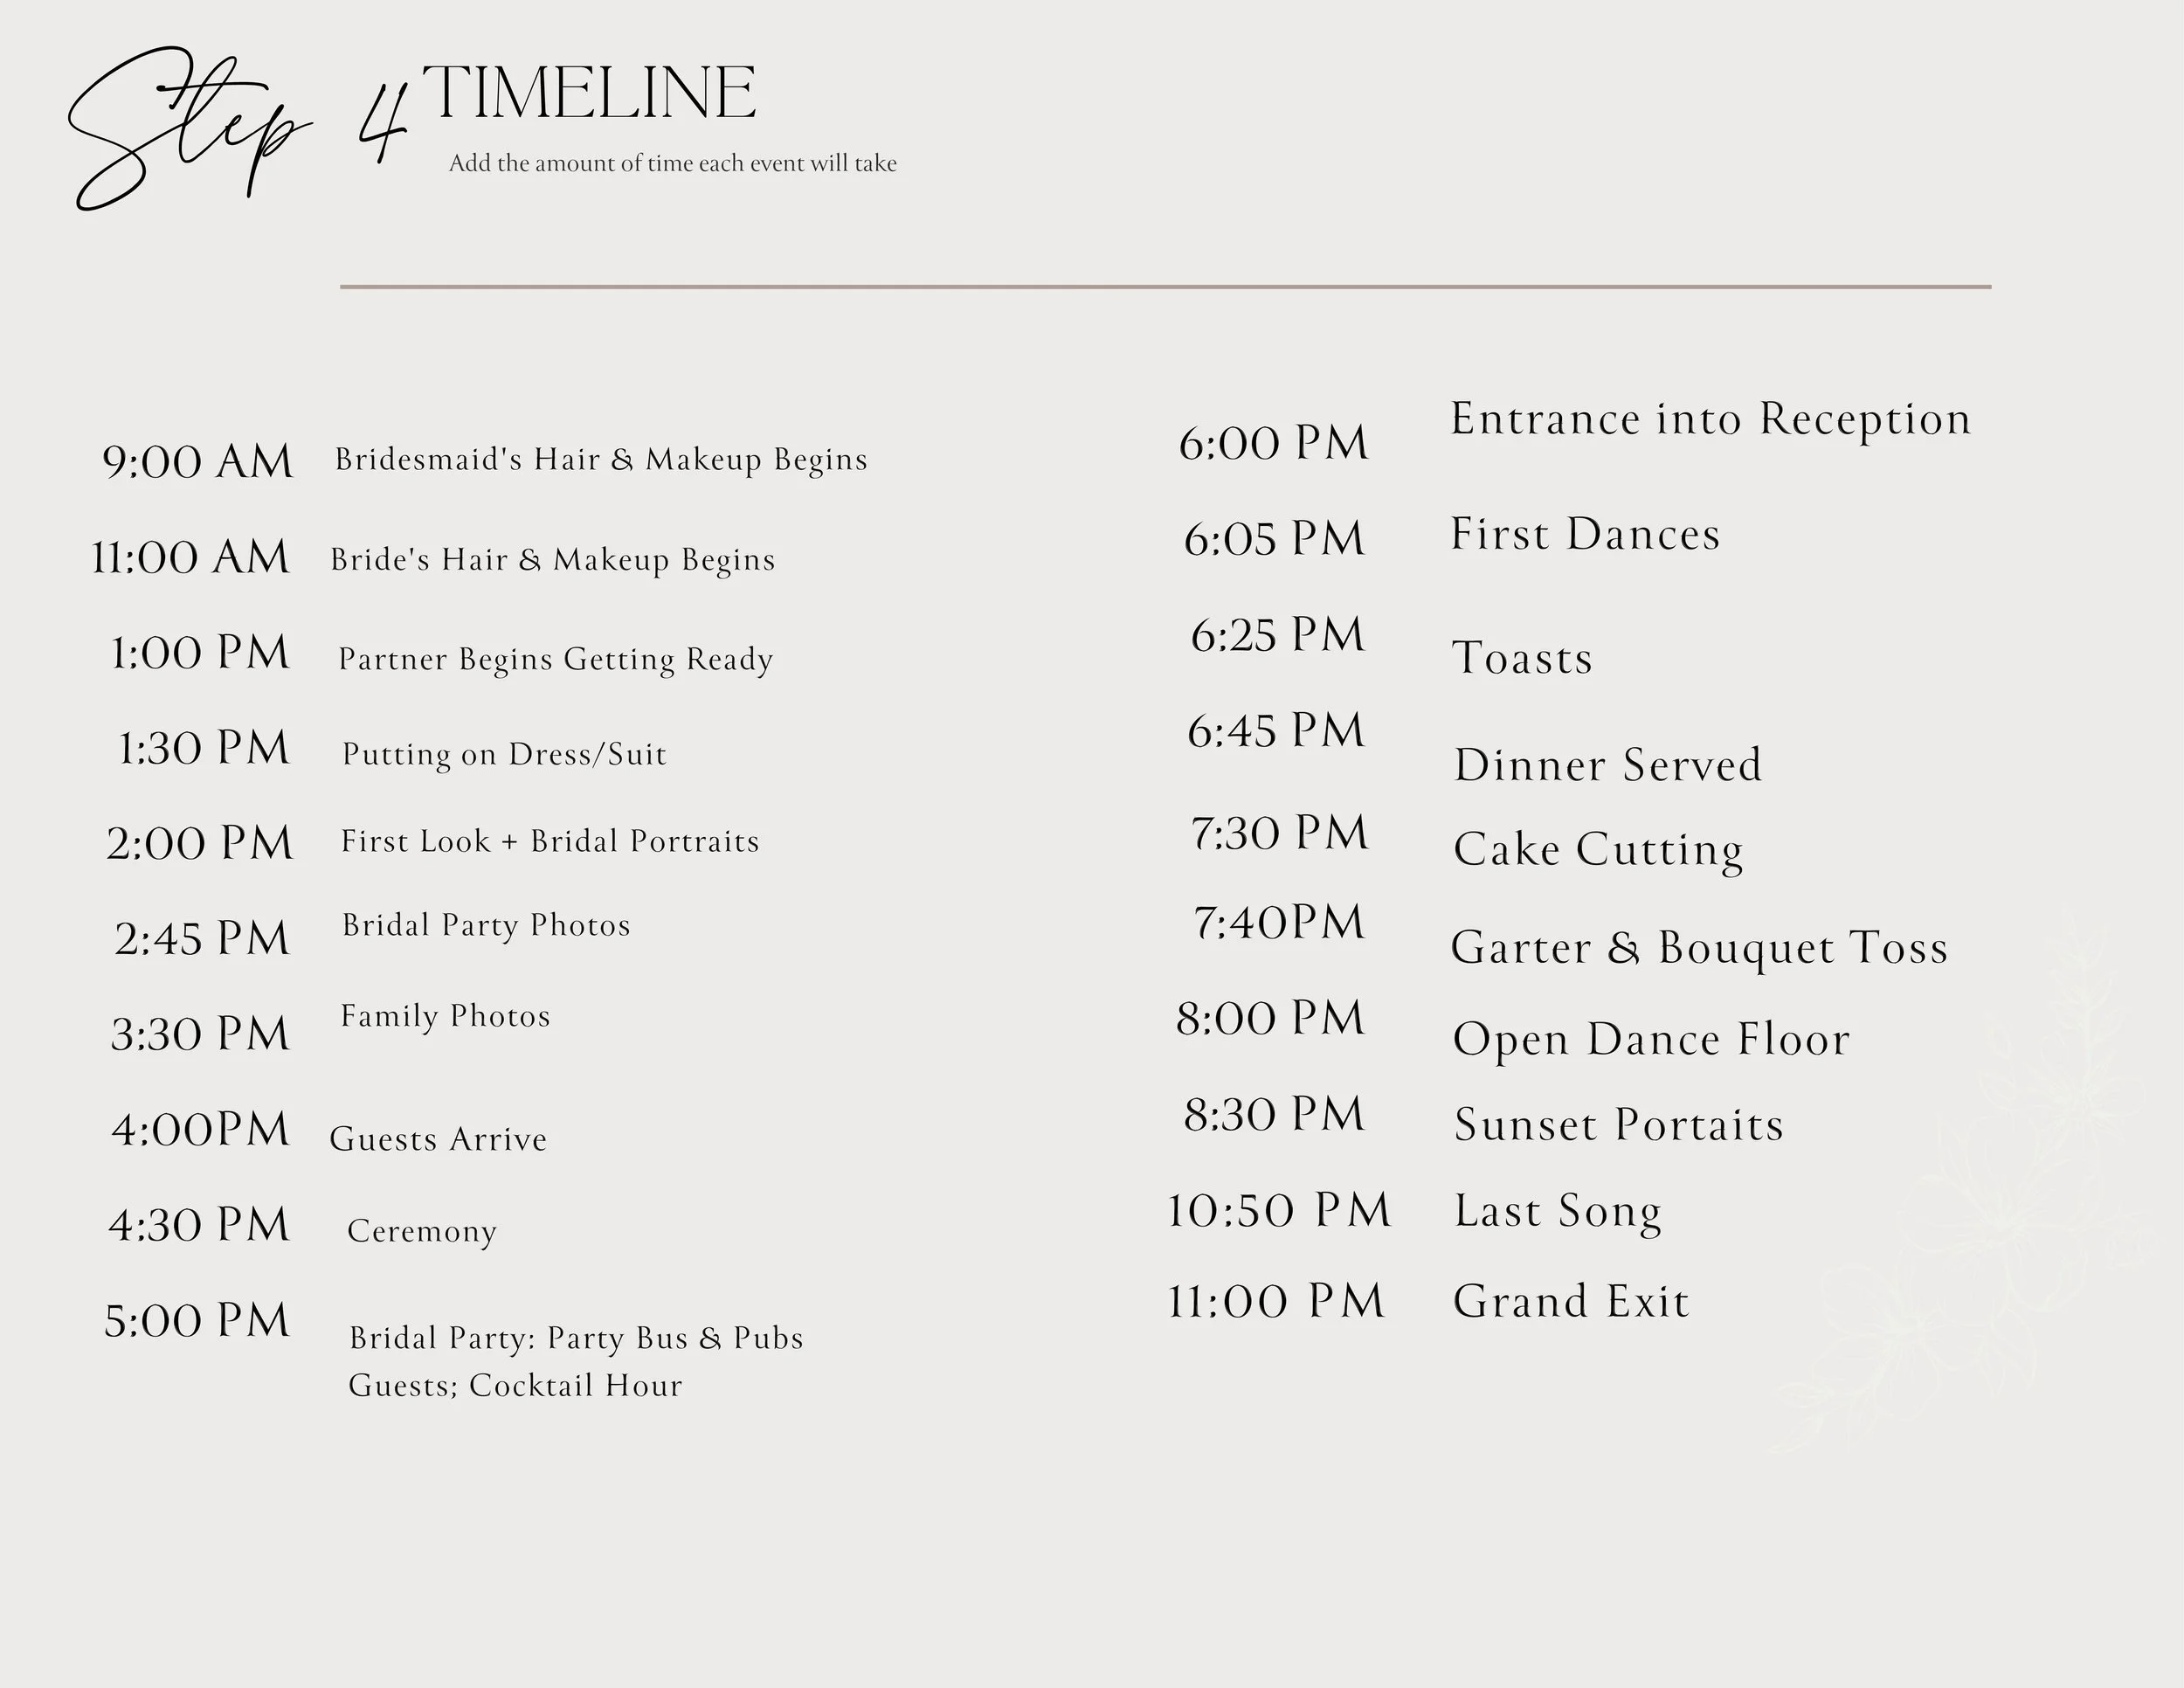
Begin adding specific times next to the events & leave room for how long they’ll take
Start with the events that must to start at a specific time. For example, if your venue requires your ceremony to start at 5:00 pm, put that on your timeline first. Or, if you know you want to serve dinner at 6:30, put that on your timeline first. You can also start with your key events (grand exit, last song, dinner, ceremony start time, etc.), and then fill in the gaps.
**Don’t forget to consider time for traveling for one venue to another, time for transitions, the period of time when guests are arriving, etc.
Now What?
Now, you’ve taken a super overwhelming task, broken it into steps, and nailed down a wedding day timeline. Congratulations! If you don’t have a wedding coordinator, I would suggest using this as a master timeline and creating separate, more detailed timelines for your bridal party, vendors, family, etc. Just be sure to double check that it works with each of your vendors before you finalize & send it off to other people!
Click here if you want to customize the examples above as a template for your own planning!